 |
| Only a few hours in...still feeling good. |
 |
| The end of the day. Bonkers. Letting the kids take over. |
Because I've had the recipe (which is not mine - can't take the credit, but I can say THANK YOU Beeckel family for sharing it with me years ago) and the how-to requested a few times, I thought I'd post Part One here now. I'll post more about the construction and decorating after we decorate them this Friday.
First: the recipe. This makes somewhere around 10-11 small houses.
7-8 cups flour
2 tablespoons ginger
1 tablespoon cinnamon
2 tsp cloves
2 tsp nutmeg
1.5 tsp baking soda
1.5 tsp salt
2.5 cups sugar
1.5 cups butter, softened (I use margarine when I make these, because it's so much cheaper and we don't actually eat the gingerbread...)
1.5 cups molasses
1/2 cup water
Beat butter (margarine) and sugar until light. Add molasses and water; beat. Add flour/spice/soda/salt mixture, as much as needed to make a stiff dough. I refrigerate the dough for a few hours (or, you know, a week or two if I am organized enough to make it that far ahead of time), but sometimes it needs to soften a bit to roll it out. Roll about 1/8-1/4 inch thick (pretty thinnish on a well-floured surface. Cut into house pieces (look for patterns online or make your own simple one).
Put on baking sheets lined with either silicone baking mats (like Silpat) or parchment paper, which can be found at the grocery store with the aluminum foil and plastic wrap. The Silpat/parchment paper is pretty important, or you will be awfully disappointed when your pieces stick and then break as you try to get them off.
Bake at 350 until the pieces puff up a bit and then sort of flatten back out - maybe 15 minutes or so? They'll be soft when you first take them out of the oven, but let them cool for a few minutes on the baking sheet before you put them on a wire rack to finish cooling and hardening.
To make your own simple pattern, experiment with paper and scissors until you get what you like, then cut out of stiff paper and LABEL your pieces. Sometimes the roof piece can look an awful lot like a side piece, and then things get all mixed up. Or so I've heard. Heh.
The dimensions I use are as follows:
Roof: 4 1/4 inches x 3 1/8 inches
End pieces (with triangular top for pitched roof): 3 1/2 inches wide x 4 1/2 inches to top of pitched roof (does that make sense?)
Side pieces: 4 inches wide x 3 inches tall
You need two of each piece for one house.
Lay your paper templates on the rolled out dough and cut with either a sharp knife or a pizza cutter. I pretty much always use a pizza cutter now.
 |
| Just to give you an idea. Of course I normally roll out a really large amount of dough and cut a bunch at once. |
To transfer, a very thin spatula is useful. A very thin metal one is great.
They're pretty small houses but a good size if you're making for a bunch of kiddos and they're awfully cute...
Tips:
If you are going to cut out windows or doors or anything like that, do it AFTER you have transferred the pieces to the baking sheet, otherwise they're harder to move. I use mini-cookie cutters like hearts, circles and stars for the windows, but I've also just cut little windows out with a knife. They don't have to be perfect to be cute.
Don't worry if your pieces get a little wonky and not perfectly straight after they've been transferred to the baking sheet. Do what you can to straighten them out before baking, but just remember that they'll still work for putting them together if you have a lot of royal icing, and also they'll be candy-encrusted, which will cover a multitude of sins.
The dough scraps can be gathered and re-rolled over and over. Since they probably won't get eaten, it doesn't matter if the dough gets tough.
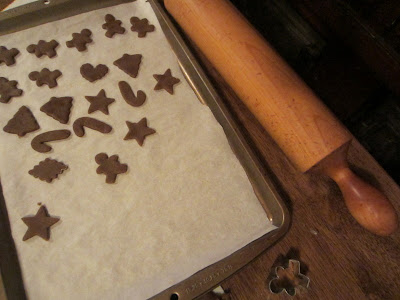
Besides being useful for windows, I love mini-cookie cutters for things like candy canes and little tiny gingerbread men. Cute, cute.
And, just because they're cute.


